Advanced options
This option is not available with Capture Pro Limited Edition.
The Output tab on the Job Setup dialog box has three groups of options on the left side of the tab. To view all three options, .
For more information on a field, click the green field name.
The Image Processing options under Advanced Options include:
- the auto-deletion option allows you to set options for automatically deleting an image with no content or very busy pages (e.g., the back of a form which has a lot of explanatory text on it). Auto deletion settings are specified independently for front and back images.
If you are scanning both color/grayscale and black and white image types, auto deletion settings are also set independently. Therefore, you can choose to delete one type of image or both.
- analyzes the content of your documents and orients each document so it is right-reading.
Auto orientation does not work with all character sets. It is recommended that you scan some test documents to ensure the document will be oriented correctly.
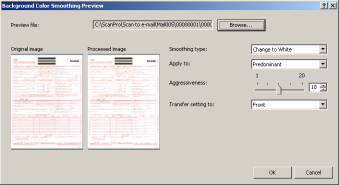
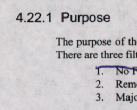
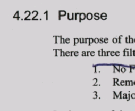
- this option can be used for documents or forms with a background color to help produce images with a uniform background color. The smoothing options can be applied to the front and/or back of a page.
|
|
|
|
Before
Background |
After
Background |
Image Edge Fill -allows you to fill and clean the edges on a scanned image by covering the area in Black or White (as selected). This option can be applied to the front and back of an image. You may want to use this option if you have pages with punch holes that you want to clean up.
|
|
|
|
Original:
3-hole punch |
Image with 37/100th of an inch which fills half of the hole. Therefore, the value of 37 is not enough. |
|
|
|
|
Image with 62/100th |
Image with 150/100th of an inch fills the entire hole AND removes some text. Therefore, the value of 150 is too high. |
-
Select a value in the Top, Left/Right and/or Bottom area(s) from each side of the scanned image to be filled in 1/100ths of an inch, or select All sides match to fill in the same amount on all sides.
When using Image Edge Fill, be careful not to enter a value too large as it could fill in image data that you want to keep
- allows you to stamp the image number on the front and/or back of your image.
Rotate - allows
you to select the desired rotation of 0,
90, 180 or
270 degrees. Applies to all images
in the batch![]() A collection of documents or images that are uniquely indexed. A job setup can contain several batches, each up to 999999999 documents. Processing a batch means converting the batch to a specific output format (e.g., single-page TIFF, PDF, LaserFiche) and sending it to a batch destination folder/subdirectory. Batches can be processed one by one or together. .
A collection of documents or images that are uniquely indexed. A job setup can contain several batches, each up to 999999999 documents. Processing a batch means converting the batch to a specific output format (e.g., single-page TIFF, PDF, LaserFiche) and sending it to a batch destination folder/subdirectory. Batches can be processed one by one or together. .

Stitch - merges all images of a document into a single output file. Images must be the same width and all but the last image must be the same length.
Split - allows you to convert the front and rear image into multiple (up to 6) images. Images must be the same type (color/grayscale or black and white). For more information on splitting documents, click here.
OK - saves your settings and closes the dialog box.
To return to the Output tab, click here. To return to the Job Setup dialog box, click here.
![]()
See also:
Index tab - Job Setup dialog box
Capture tab - Job Setup dialog box
